 Nearpod is one of my absolute FAVORITE tools to use in my 1:1 classroom. In my dual credit social studies classes, I run more of a blended than flipped classroom in that I lecture 2-3 days per week and allow the remaining class time to be used for completing work. I try to mimic a college schedule as much as I can, and since I see my students every day, this plan works pretty well.
One of the many reasons I love Nearpod is that it helps me create an engaging, interactive environment for my students. No longer are my presentations simply projected on the white board while my students frantically copy down information. Now, my Nearpod lesson is displayed on their individual Chromebook which allows them to not only view the information without peering over the heads of their classmates, but also allows them to interact with the various images, virtual tours, and activities within the presentation making it much more FUN!
If you’re looking to get started with Nearpod, here’s a quick how-to guide 🙂
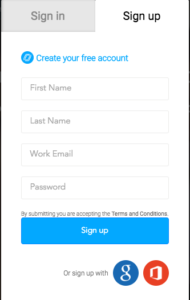
Create an account
Nearpod offers various account levels, each providing different perks. The “silver account” allows you to create lessons and include formative assessments in those lessons. However, it does not allow teachers to add websites, YouTube videos, games, etc into Nearpod lessons. One of my favorite features, the virtual tours, is also unavailable through the silver account. My suggestion? Spring for the “gold account!” This allows you to utilize the fabulous features of Nearpod that promote student engagement – virtual tours of awesome places ranging from Pyramids to Mars and everywhere in between, awesome 3D images and more! The gold account starts at $10 per month per teacher and is definitely worth it. Read more about pricing here.
Explore lessons
Are you looking for an engaging lesson for your students and don’t have time to reinvent the wheel? Check out the awesome lessons library! Search through the lesson library, set filters that relate to your content, and add free (or inexpensive) lessons to your account! It’s fantastic! Do you use Common Sense Education curriculum at your school? Be sure to access the lessons for each unit!
Create your own
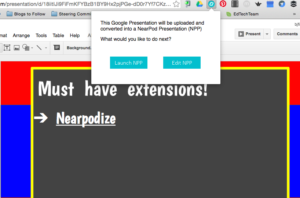
When you’re ready to create your own Nearpod, you have a few different options. Teachers can create Nearpod presentations through the “Create” feature on the dashboard page. This allows you to upload a file from your computer, in a PNG, PDF, or PPT file to create a presentation or individual slides. OR … you can us e my personal favorite, the Nearpodize extension! Most of my presentations are created using Google Slides. To quickly create a Nearpod lesson from your Google Slides presentation, simply open your presentation, select the Nearpodize extension, and watch the magic happen! It’s fabulous!
Now, you’re ready to get started with Nearpod! Check out this post for more of my favorite Nearpod features!
If you or your school district would like more information about how to use Nearpod in the classroom? Please let me know! I would love to help you learn about and love using this fabulous tool!!

Love using Nearpod and it can be awesome to turn it over to the kids to have them design lessons.