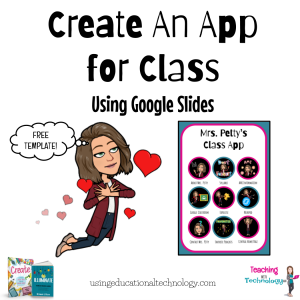
Happy Monday, all! I’ve been back in my classroom (for meetings and work time) since Friday, and I’m slowly growing accustomed to missing the afternoon naps that I have loved soooooo much during our summer vacation. Coffee to the rescue! In an effort to organize important information and make it more accessible for my students and their families, I decided to create a classroom app to share this year. Before you panic and say, “I can’t code an app!” I made this with Google Slides! You know how much I love Google Slides and use it for just about anything from HyperDocs, to presentations, to syllabi, and images, and more. Now, I can add an app to that list! Here’s how I did it:
OPEN GOOGLE SLIDES
To get started, simply open a new Google Slides presentation by typing slides.new in the address bar of your browser. No need to go to your Drive to create a new presentation!
Next, resize your presentation to make it look more “app-like.” I used 8 x 11.5 inches, but you can play around with the size. To resize your presentation, click File, then Page Setup, click the dropdown menu in the next dialogue box and select “Custom.”
Now, it’s time to design your app! You’re welcome to use my template as a starting point – grab it by completing the super short form here! One slide 1, you’ll see a “welcome” page as well as links to directions for adding the “app” In the example/template on slide 2, you’ll see 9 circles that direct users to various external links, including my “About the Teacher” page, a Linktree with my favorite content related podcasts, our frequently-used sites, our school district homepage, and a “contact me” icon that prompts users to send me an email.
To customize your the “buttons,” click the icon and select CTRL K and enter the information you’d like the icon to link to, whether it be a slide from the presentation or an external link.
Next, you’ll publish your presentation, I mean “app,” to the web by selecting File, then Publish to the Web. This will create a live version of your presentation (AHEM, app) that users will only view in “present” mode (no slides on the left side of the presentation, menu buttons, etc).
Copy and paste the published link (from the Publish to the Web dialogue box) into your Google Site, Google Classroom, email, Remind message, etc., and share it with your students. Encourage your students (and their parents) to open the link with their smartphone. Next, you’ll follow the instructions on the presentation to add the presentation AS AN APP to the home screen of your device – this works for Android AND iOS devices!
That’s it! You’ve made an accessible, helpful app that your students and parents can use throughout the school year, whatever your year looks like.
I hope you’re having an awesome week and are staying healthy as we prep for a new school year.
P.S. — DID YOU KNOW CREATE IS AVAILABLE?! Grab your copy of Create: Illuminate Student Voice Through Student Choice today!


Is there a way to prevent users from using the arrow keys to advance through your Google slide presentation so they just use the linked buttons in the app you created?
Hey, Lynda!
The best way to prevent that (not completely stop it) is to share the published link with your students. Also, maybe let them know that the linked images make it easier for them to navigate?
Hope that helps!
Bethany
Can you edit or change anything within the app during the year?
Absolutely! Simply open your slides presentation and make your adjustments!
My mind is blown simply by the discovery of new.doc/slides! Haha I wish it worked for sheets and forms too!
I also LOVE this idea for an easy app for students and families to check homework, email, etc. Thank you for sharing!
Hey, Heather!
It does! The .new feature now works for Slides, Docs, Forms, Sheets, and Drawings!
Happy May!
Bethany