Happy Tuesday (I think?), all! I hope you’re having a fabulous week and are staying cool and healthy. You know the heat and humidity is bad in Missouri when my daughters VOLUNTARILY come in from playing outside because “it’s just too hot, Mom!” My back-to-school teacher brain is starting to rev up again, even though I’m not entirely sure what in the world that’s going to look like! I’m sure many of you are in the same boat as me. One of the ideas that popped into my head earlier today was how I could use the popular website, Linktree, in my classroom. If you’re on Instagram, you know that users can only include one URL in their bio which can be pretty tricky if you’re like me and have multiple sites to share! (Have you seen the newest at bethanypetty.com yet!?) While Linktree is great for sharing links on social media, it’s somewhat limited – the free version, at least!. So … while I created Linktree for my social media platforms, I decided to “Googlfy” Linktree using Google Slides for my classroom! Here’s how I did it …

Open a New Slides Presentation
Instead of opening your Google Drive, clicking new, scrolling to Slides … try typing slides.new into the address bar of your Chrome browser! Voila! A brand new Slides presentation, ready for you to make beautiful!
Resize the Presentation
This is probably one of the MOST underused features but one that really lets you get the MOST out of Google Slides. To resize your presentation simply follow these steps –> File – Page Setup – Click the dropdown menu and choose “custom.” Then, choose the size you’d like! An easy way to create a “Google Doc” with a background is to simply resize your Google Slides presentation! Then, add backgrounds, text boxes, and more!
Add Text Boxes
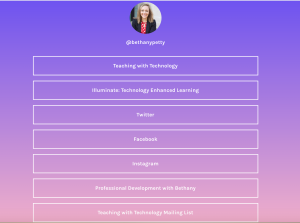
When you’re happy with the size of your slide (I set mine to 7×5 inches) it’s time to add text boxes! If you’re unfamiliar with Linktree, here’s what mine looks like.
Choose a Background Image
The free version of Linktree offers limited options when it comes to color, background, and theme. HOWEVER … with Google Slides, you have a virtually unlimited amount of options for backgrounds, colors, images, etc.!
Don’t Forget Your Bitmoji!
No explanation needed, here! Bitmoji is the bomb.com!
Publish to the Web and Create a bit.ly
This part is important! When you publish a Google Slides presentation “to the web,” you’re creating a webpage version of your presentation that can be accessed by anyone. You also don’t have to worry about setting sharing permissions. When you’ve published your slide presentation (File – Publish to the Web – ok – ok), you’ll want to create a shortened URL for easy access. My favorite URL shortener is Bit.ly! Give it a whirl! When your new “Schooltree” is published and you have a shortened URL, you can easily access the slide on your smartphone and add the “Schooltree” to your home screen as an app! (Check these posts for directions on how to add sites to your home screen on Android and iOS devices!)
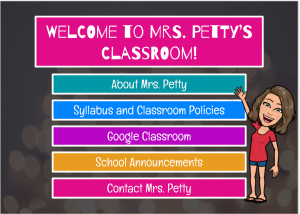
Here’s the link to my “Schooltree” if you’d like to check it out for inspiration!
That’s it! You can post your “Schooltree” on Classroom, school websites, your email signature, and MORE!
I plan to share this “Googlfied” version of a linktree virtually on Google Classroom and physically in my classroom with a QR Code!
I’m already thinking of ways my students can use this to demonstrate learning!


Leave a Reply