I was fortunate enough to attend some GREAT sessions during my time at RCET this week, and one of these great sessions was on Augmented Reality and Virtual Reality. I’ve had experience with both of these “realities” – more experience with VR than AR – and was excited to learn more about the applications for AR in the classroom!
I learned about Augmented Reality, specifically using Aurasma, a few years ago at another conference. I was, of course, extremely interested and excited about it! However, I struggled with how I could incorporate it into my classroom and curriculum. Sometimes, I learn a new app or strategy and kind of push it to the back burner because I don’t see an application in my classroom. Then, down the road, an idea pops into my head and I think, “hey! I can use (enter app or strategy) in my classroom!” This basically describes my epiphany with AR and Aurasma at RCET!
The AR/VR presenter was extremely knowledgeable and shared so many wonderful apps and video examples during her presentation! One video that REALLY got my attention was this from the WWF and Coke … as I was watching, I kept thinking about how I could use this technology to create a more engaging learning environment for my students. Seriously, this video rocks!
The tool I found most useful was Aurasma. Why, you ask? It seemed like the most user-friendly tool that was shared! AND … it’s free 🙂
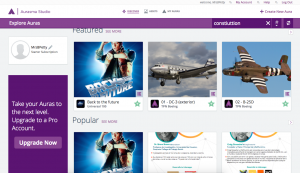
To get started with Aurasma, simply create a free account and dive right in! Before creating your own Aura, check out the featured images, and be sure to search for Auras that are relevant to your content.
When you’re ready to create your own, click “my Auras,” then select “create new Aura” in the top right corner of the screen.
Next, you’ll select a “trigger” to upload, either from your device or from your Aurasma account. This image will serve as the trigger, for lack of a better word, for your Aura. Basically, when you scan this image with your phone, using the Aurasma app, the media you layer on top of the image will appear/play.
You’ll first be asked to name your Aura. Next, you’ll upload the “trigger” for your Aura. The other information is not necessary to create your Aura 🙂
After you’ve uploaded your trigger image, you’ll be able to add another “layer” to your Aura. The layer is what will appear when the Aurasma app is hovering over the trigger image.
You will need to upload a file – image, photo, video – from your computer. To my knowledge, adding a YouTube video, for example, is not an available option.
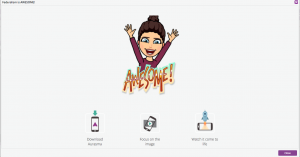
Then, you’re ready to try it out! Display your Aura anywhere … test it on your computer screen! Simply download the Aurasma app (free!) and choose the square icon on the bottom of the screen. Hover over your Aura and watch the magic begin! Check out my Aura below!
I’ll be using Aurasma in my classroom to create interactive review games and will probably include one on my next digital BreakoutEDU!


Leave a Reply